Adventures in Nesting
Gardening, decorating, cooking, DIYing, and the occasional Pinterest blackout — all with a dash of salt in southern New England.
Tuesday, December 3, 2019
Monday, September 30, 2019
Wiksten Haori in Linen and Double Gauze
The Haori Jacket pattern from Wiksten has been on my to-make list for quite a while, and with all the incredible versions on Instagram floating around, I was super excited to try it in linen. My body measurements matched up with size Small for the pattern, but upon reading reviews I sized down to XS and am very glad I did! It is still quite roomy! I sewed the mid-length version.
For the outer fabric, I used Robert Kaufman's Brussels Washer Linen/Rayon blend in the color O.D. Green from Stonemountain and Daughter Fabrics. The lining fabric is Nani Iro double-gauze in the Fuccra print from Weave and Woven on Etsy. Both have a nice, soft drape.
It's reversible! I think I will end up wearing the green side out more often because it's a little more youthful (Nate says I look like an art teacher with the printed side out). The double gauze is softer than the linen/rayon blend.
The real reason I made a Haori jacket for myself is that I was planning to make one for a friend and needed to test the pattern first. The one for my friend is in a wax-printed cotton from Malawi and lined in Kaufman Brussels Washer Linen/Rayon in Bordeaux from fabric.com to match the outer bicycle wheels.
I love the bicycle fabric but it's quite a bit stiffer than the linen. I ran it through the wash with fabric softener a few times, and hope it will continue to soften over time.
The "art teacher" vibe is strong. Good thing it's going to an art teacher!
I was so excited to deliver it, I didn't stop to take nice photos! Whoops! This is clearly not the outfit I'd choose to wear this jacket with.
Haven't decided how I feel with the linen side out. It feels a little minister-y? Hooray for completing one more item on my make-nine list for 2019!
Thursday, May 16, 2019
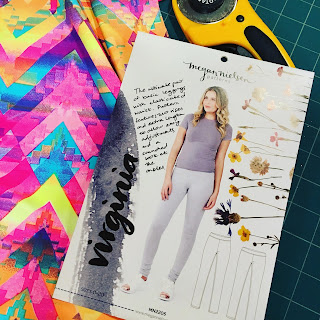
Sewing Megan Nielsen's Virginia Leggings
 |
| Megan Nielsen's Virginia Legging pattern |
Woop Woop! My first attempt at sewing my own activewear! I made the Virginia Legging from pattern designer Megan Nielsen. I've sewn Megan Nielsen patterns before and found that they run a little on the snug side (for me), so I erred on the side of my biggest measurements and was happy I did. I also followed the tutorial for a high waist from the Megan Nielsen blog.
 |
| I bought this fabric from Nunez Fabrics in Miami. |
 |
| Here are front and back views of the Virginia leggings |
 |
| I just can't get enough of this print! |
 |
| I tried them out with my first attempt at a tee shirt, the Hemlock Tee by Grainline Studio |
 |
| I still haven't figured out how to make a really smooth seam for the bottom band. |
 | |
| "Doing absolutely nothing in my ACTIVEWEAR ACTIVEWEAR" |
By total coincidence, a few days after I finished my leggings, my local yoga studio was having a black light yoga night. The leggings were perfect! And what do you at the end of black light yoga? A photo shoot, of course.

Love this pattern, I want to make 100 pairs! On the next pair I will try adding a gusset because the crotch makes me a little nervous when doing skandasana (side lunges) and prasarita padottanasana (wide-legged forward bend) in yoga.
Tuesday, May 1, 2018
Johnny Romper
George is getting a new romper! The pattern is Johnny from Children's Corner, and the fabric is an old sheet that came with our house. Even though George is only 5 months old, he's super tall and wearing 12-month clothing. At this rate of growth, I don't even know what size to sew! I settled on the 18-month romper because I'd rather it be too big than too small, and I hemmed up the pant legs considerably. The waist and shoulder-to-crotch measurements on the 18-month size looked about right for the measurements that Molly took of George.
I really enjoyed sewing this pattern. It was fairly easy to follow and the finished product looks quite clean thanks to it being fully lined.
I really enjoyed sewing this pattern. It was fairly easy to follow and the finished product looks quite clean thanks to it being fully lined.
Saturday, April 21, 2018
Off-The-Shoulder Top
I got this amazing fabric in Malawi and have been dying to try it out! I knew I wanted to make an off-the-shoulder top and found this great tutorial from Holly on the Megan Nielsen blog. It was a really quick sew and super simple. Holly recommends doubling your measurement for a really full dress, and I found that I had to use much less fabric for the top - maybe 8 inches less - to keep it from being too wide. I think in a lighter fabric with more drape, like a rayon, you wouldn't have to do this. I will definitely be making more of these!
Tuesday, November 28, 2017
Nani Iro Vest
I got this adorable Nani Iro Pocho quilted double-gauze fabric from Miss Matatabi and decided to make Lucy a vest. I copied the measurements loosely on a size 3T t-shirt I had, and took instruction from this post by Sewing Rabbit and this post by Sew a Little Seam. Both were super helpful! This was also one of my first attempts using bias binding, and I love how clean it looks! I used the pale pink at the arms and neck to make it look more feminine, but in retrospect I wish I had used orange for all of it because then it would be easier to pass down to George. Live and learn!
Sunday, September 17, 2017
Liberty Print Dress


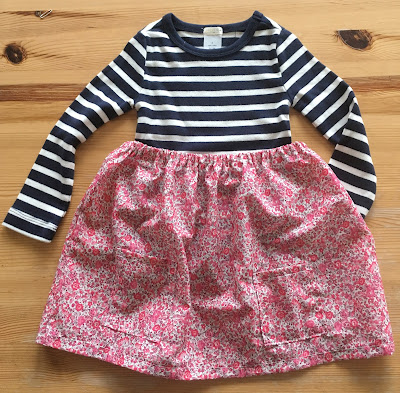
As a beginner sewist (Seamstress? Sewer?), I am very excited about my first attempt at making something for my niece! I was recently at a tent sale in Westerly where I was totally inspired by the dresses made by Sailor Rose. They look just like more professional versions of what you see here: knit stripes on top, Liberty of London fabric for a skirt. Sadly, I couldn't afford the dresses they had at the tent, but I was determined to try my own. I started by sewing a rectangle of the Liberty fabric into a big loop, then folded the top over twice to make a tunnel for an elastic waistband. I sewed this to a store-bought tee shirt by hand (really hoping this will stand up to abuse!)... I need to learn more about how to make things stretch with machine stitching. I hemmed the bottom, added a couple patch pockets, and that's it!
Then I got a little bold and tried again using fabric left over from the guest bedroom duvet covers. It was my first attempt at gathers. Will have to work on this skill!
Now, of course, comes the hard part: getting my 2-year-old model to stand still for a photo!
Subscribe to:
Comments (Atom)


