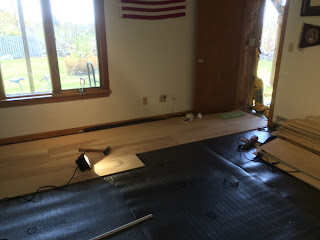
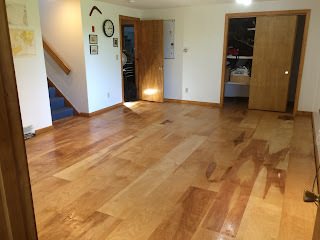
Here's the floor after we pulled up the carpet, with just the plywood subfloor:
After measuring and researching plywood options, we decided on birch 4'x8' panels, which we had the nice guy at Home Depot cut into 1' wide strips:
We also bought rolls of underlayment for sound dampening and insulation:
After letting the wood acclimate in the room for about a week, we got to work. First we rolled out the underlayment, using the staple gun to attach it to the subfloor. We left a little extra around all the edges.
Then we got to work on the boards. We used our compressor and nail gun to attach the boards to the floor. I had read that it's more secure to send the nails in at an angle, but we couldn't get them to go in all the way when we tried that, so we ended up just sending them straight down. We used a rubber mallet to bang each board nice and tight to the one next to it, with someone standing on the board to hold it in place. This process took us about a week, spending an hour or two each day.
When we got to the final row, we had to cut ("rip") the last boards the long way for them to fit. We used the silly saw to get the part around the door frame, and it's not perfect. But it fits. We'll be putting 1/4 round moulding all around the room, so the edges didn't have to be perfect.
Next came time for poly. We decided on Minwax Polyurethane for Floors in Satin finish, primarily because it's the same stuff we used for the studio floor upstairs. The satin finish should hide scuffs a little better than a high gloss would.
I can't exaggerate how much easier this was to do with the correct tools — namely, a roller with a long handle — than the first time around on the studio. I first went around the edges of the room with a brush and then rolled on the main part of the floor, and each coat took a little under an hour. We didn't bother taping because we plan to paint the base moulding. I had a little hiccup halfway through: the instructions on the poly say you can recoat after 6 hours, but if you wait more than 10 hours, you need to sand before the next coat. I ran out of poly after 2 coats and would have to go to Home Depot for more, putting me past the 10 hour mark. This turned out to be a blessing in disguise. The floor had a little bit of a grit to it when the 2 coats dried, we're not really sure why. Maybe I did a bad job with the rolling. Anyway sanding the floor really helped to smooth it out, so when we went back the next weekend to do the last 2 coats it really looked great.
Next up is the moulding around the base of the walls, which will be painted white. First came primer:


